Cheesy Ground Chicken and Rice Burritos Recipe
Introduction
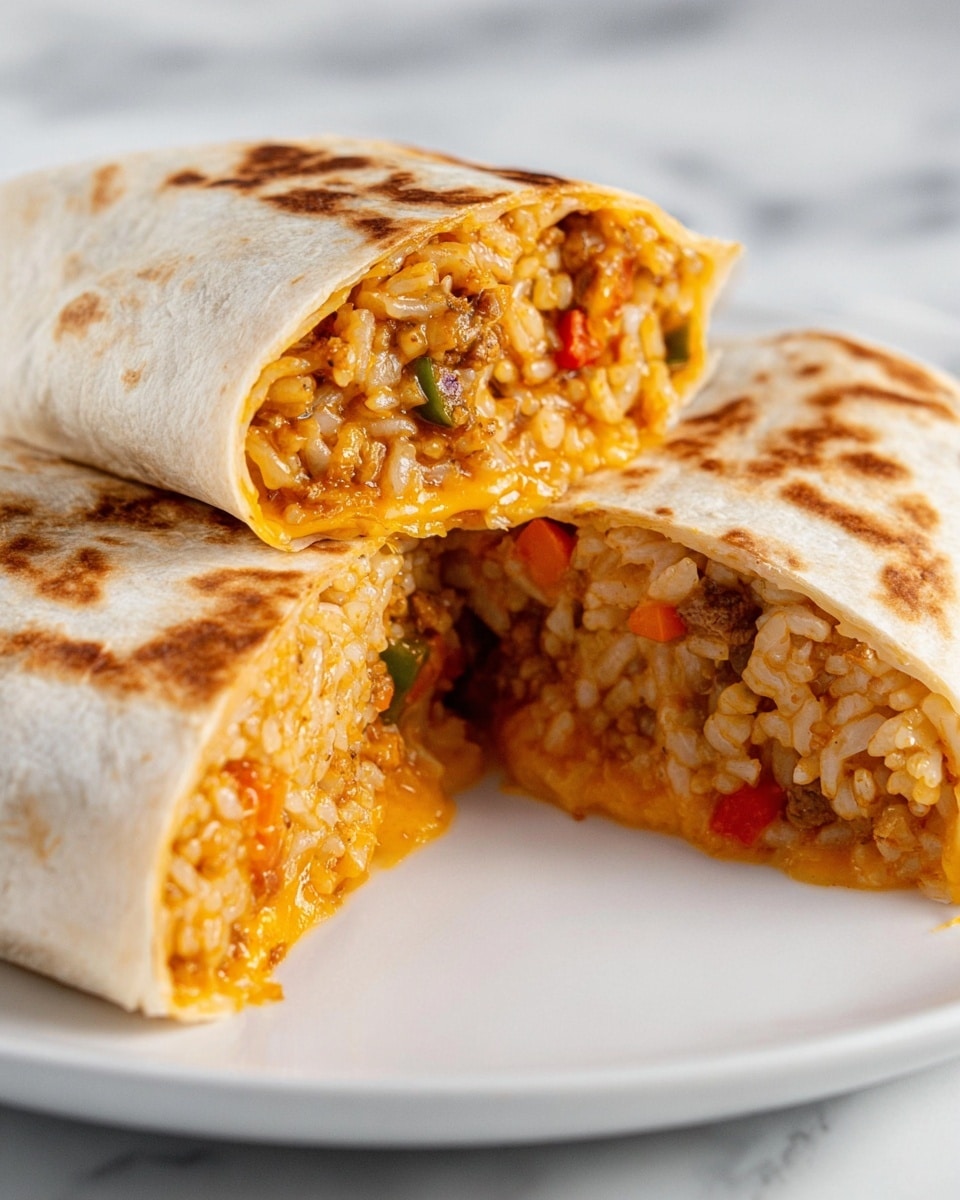
These Cheesy Ground Chicken and Rice Burritos are a flavorful and satisfying meal perfect for any day of the week. Packed with seasoned ground chicken, veggies, and melted cheese, they deliver a comforting Tex-Mex twist that’s easy to make at home. Enjoy them fresh off the pan toasted to perfection.
Ingredients
- 1 tbsp. Avocado Oil or Olive Oil
- 8 oz. Ground Chicken
- 1/2 cup chopped Red Bell Pepper
- 1/3 cup chopped White Onion
- 1 tbsp. finely chopped Jalapeño Pepper (optional)
- 1 tsp. Garlic Powder
- 1 tsp. Chili Powder
- 1/2 tsp. Kosher Salt or 1/4 tsp. Sea Salt, plus more to taste
- 1/2 tsp. Ground Cumin
- 1 cup Cooked Rice
- 1/4 cup Salsa Verde or your favorite salsa
- 1 tbsp. Chipotle Sauce
- 1 cup Shredded Cheddar Cheese
- 1 cup Shredded Monterey Jack Cheese
- 4 Extra Large Flour Tortillas (burrito-sized)
Instructions
- Step 1: Heat 1 tablespoon of avocado or olive oil in a large nonstick skillet over medium heat. Add the ground chicken, chopped red bell pepper, white onion, and jalapeño pepper (if using). Season with a pinch of salt and cook for 7-8 minutes, breaking the chicken into small pieces as it cooks until the chicken is fully cooked and the vegetables have softened.
- Step 2: Stir in the garlic powder, chili powder, kosher salt, and ground cumin. Cook for 1-2 minutes to toast the spices and deepen their flavor.
- Step 3: Add the cooked rice, salsa verde, and chipotle sauce to the skillet. Mix everything well to combine, then taste and adjust the seasoning with additional salt if needed. Remove the skillet from heat.
- Step 4: Lay a flour tortilla flat and spread 1/4 cup of shredded cheese down the center. Spoon about 1/2 cup of the chicken and rice mixture on top of the cheese, and sprinkle another 1/4 cup of cheese over the filling.
- Step 5: Fold the sides of the tortilla inward and roll it up tightly into a burrito. Place the burrito seam side down on a nonstick pan over medium heat and toast until golden brown. Flip and toast the other side as well, allowing the cheese inside to melt.
- Step 6: Serve warm with your favorite dips like sour cream, salsa, or guacamole, or alongside creamy refried beans or chips and salsa.
Tips & Variations
- For a spicier kick, add extra jalapeño or a pinch of cayenne pepper to the filling.
- Swap ground chicken for ground turkey or beef if preferred.
- Use brown rice or cauliflower rice for a healthier alternative.
- Try different cheeses such as pepper jack or a Mexican blend for varied flavors.
- If you like, warm the tortillas briefly before assembling to make them more pliable and easier to roll.
Storage
Store leftover burritos in an airtight container in the refrigerator for up to 3 days. To reheat, toast them again in a skillet over medium heat until warmed through and the cheese melts. Alternatively, microwave on a microwave-safe plate for about 1-2 minutes, then crisp them briefly in a pan if desired.
How to Serve

Serve this delicious recipe with your favorite sides.
FAQs
Can I make these burritos ahead of time?
Yes, you can prepare the filling and assemble the burritos in advance. Keep them refrigerated and toast or heat just before serving for the best texture.
What can I use instead of chipotle sauce?
If you don’t have chipotle sauce, you can substitute with chipotle powder mixed with a little sour cream or use your favorite smoky hot sauce to add similar flavor.
PrintCheesy Ground Chicken and Rice Burritos Recipe

These Cheesy Ground Chicken and Rice Burritos are a flavorful and satisfying meal perfect for a quick lunch or dinner. Packed with seasoned ground chicken, sautéed vegetables, rice, salsa verde, chipotle sauce, and a blend of melted cheddar and Monterey Jack cheeses, these burritos are wrapped in warm flour tortillas and toasted to golden perfection for a crispy finish. They offer a comforting blend of spices and textures that’s sure to please the whole family.
- Prep Time: 10 minutes
- Cook Time: 15 minutes
- Total Time: 25 minutes
- Yield: 4 burritos 1x
- Category: Main Dish
- Method: Stovetop
- Cuisine: Mexican-inspired
Ingredients
For the Filling
- 1 tbsp. Avocado Oil or Olive Oil
- 8 oz. Ground Chicken
- 1/2 cup chopped Red Bell Pepper
- 1/3 cup chopped White Onion
- 1 tbsp. finely chopped Jalapeño Pepper (optional)
- 1 tsp. Garlic Powder
- 1 tsp. Chili Powder
- 1/2 tsp. Kosher Salt or 1/4 tsp. Sea Salt, plus more to taste
- 1/2 tsp. Ground Cumin
- 1 cup Cooked Rice
- 1/4 cup Salsa Verde or your favorite salsa
- 1 tbsp. Chipotle Sauce
Cheese and Tortillas
- 1 cup Shredded Cheddar Cheese
- 1 cup Shredded Monterey Jack Cheese
- 4 Extra Large Flour Tortillas (burrito-sized)
Instructions
- Cook the Ground Chicken and Vegetables: Heat 1 tablespoon of avocado or olive oil in a large nonstick skillet over medium heat. When the oil is hot, add the ground chicken, chopped red bell pepper, white onion, and jalapeño pepper (if using). Season with a pinch of salt. Cook for 7-8 minutes, breaking the chicken into small pieces as it cooks, until the chicken is cooked through and the vegetables have softened.
- Add Seasonings: Sprinkle in garlic powder, chili powder, kosher salt, and ground cumin. Stir well to coat the chicken and veggies with the spices. Continue cooking for 1-2 minutes to toast the seasonings and enhance their flavors.
- Add Filling and Flavor: Stir in the cooked rice, salsa verde, and chipotle sauce until everything is evenly combined. Taste and add more salt if needed. Remove the skillet from the heat.
- Build and Toast the Burritos: Lay one extra large flour tortilla flat on a surface. Spread 1/4 cup of shredded cheese down the center, then add about 1/2 cup of the chicken and rice filling. Sprinkle another 1/4 cup of cheese on top. Fold the sides of the tortilla inward, then roll it up into a burrito. Place the burrito seam-side down in a nonstick pan over medium heat and toast until golden and crispy, flipping to toast all sides.
- Serve and Enjoy: Serve your cheesy ground chicken and rice burritos warm. They are delicious on their own or paired with sides like sour cream, guacamole, salsa, creamy refried beans, or your favorite chips.
Notes
- You can omit the jalapeño for a milder flavor.
- Use brown rice or cauliflower rice as a healthier alternative to white rice.
- To make these burritos spicier, add extra chipotle sauce or diced fresh jalapeños.
- Leftover burritos can be wrapped in foil and refrigerated for up to 3 days or frozen for up to 2 months.
- For a gluten-free option, substitute the flour tortillas with gluten-free tortillas or large lettuce leaves for a low-carb wrap.
Keywords: ground chicken burritos, cheesy burritos, chicken and rice wrap, quick Mexican dinner, stovetop burritos, easy lunch recipe