Lemon Energy Balls Recipe
Introduction
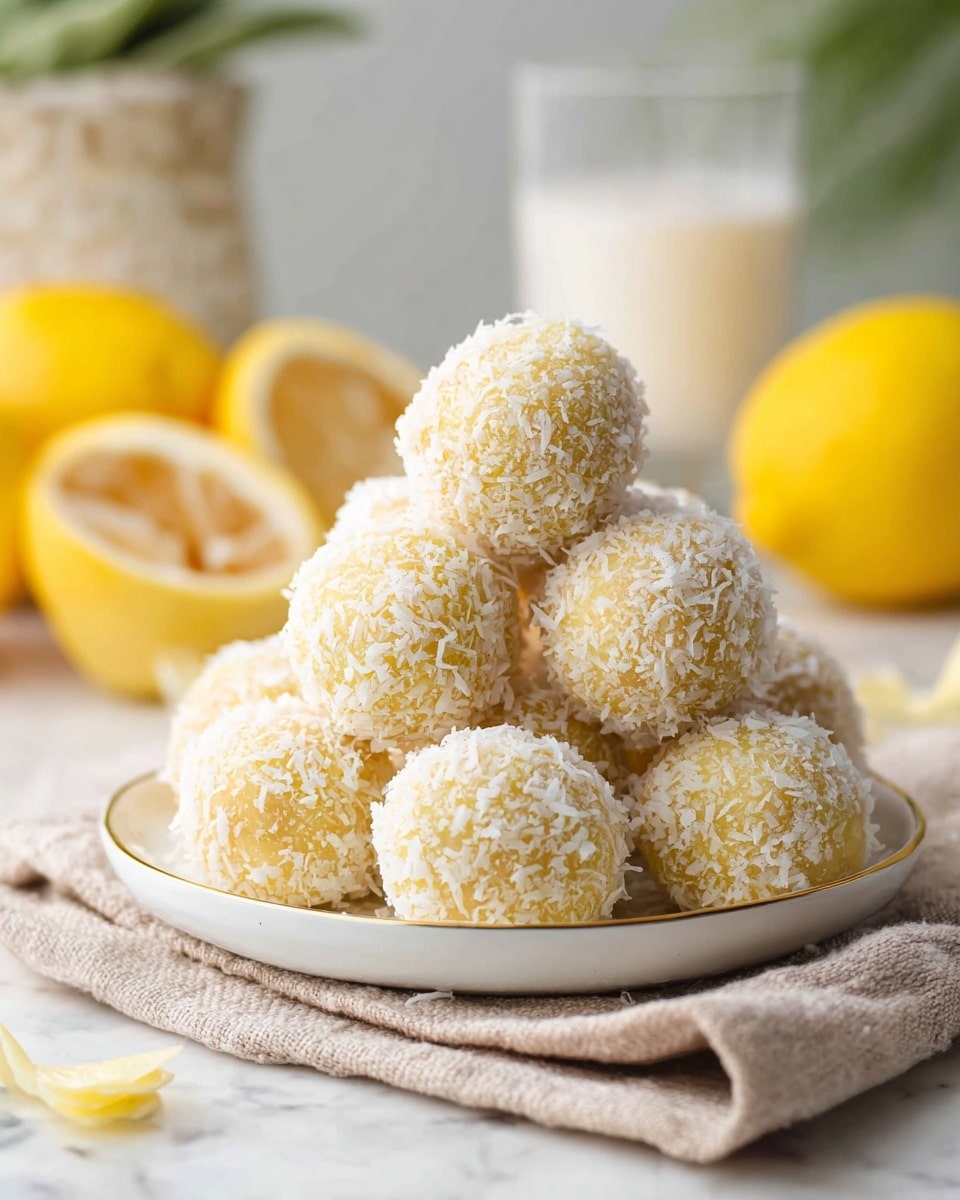
Lemon Energy Balls are a refreshing and nutritious snack perfect for a quick boost of energy. With zesty lemon flavor and a delightful coconut crunch, these no-bake treats are easy to make and ideal for any time of the day.
Ingredients
- 1 cup cashews
- 1 1/2 cups shredded coconut (unsweetened)
- 3 tablespoons coconut nectar (or maple syrup, or sugar-free syrup)
- 1/4 cup lemon juice (about half a lemon)
- 2 tablespoons lemon zest
- 2 tablespoons hemp seeds (or chia seeds or sunflower seeds)
- 1/3 cup unsweetened desiccated coconut
Instructions
- Step 1: In a food processor with the S blade, add cashews and unsweetened shredded coconut. Blend on high speed, pulsing until it forms a meal-like texture.
- Step 2: Add coconut nectar (or chosen syrup), lemon juice, and lemon zest to the mixture. Blend again on high speed until a sticky dough forms and comes together.
- Step 3: Stir in your choice of seeds and pulse a few times to incorporate them evenly. If the dough feels too wet, add more shredded coconut, 2 tablespoons at a time, blending after each addition. If too dry, add cold water 1 tablespoon at a time, blending between additions until the right consistency is reached.
- Step 4: Scoop out about one tablespoon of batter and roll it between your hands to form a ball. Then roll the ball in the desiccated coconut to coat.
- Step 5: Place the coated energy balls on a plate lined with parchment paper as you work through the remaining batter.
- Step 6: Store the finished energy balls in an airtight container in the refrigerator.
Tips & Variations
- For extra texture and flavor, try adding finely chopped dried fruit or a pinch of sea salt to the mixture before blending.
- Substitute hemp seeds with chia or sunflower seeds to vary the nutritional profile and taste.
- If you prefer a sweeter ball, increase the sweetener slightly, but be cautious to maintain the dough’s stickiness for rolling.
- Use fresh lemon zest for a vibrant citrus aroma and avoid pre-packaged zest which can lose flavor quickly.
Storage
Store the lemon energy balls in an airtight container in the refrigerator for up to 1 week. For longer storage, freeze them for up to 3 months. When ready to eat, thaw at room temperature for a soft, chewy texture.
How to Serve
Serve this delicious recipe with your favorite sides.
FAQs
Can I make these energy balls nut-free?
Yes, you can substitute cashews with seeds like sunflower or pumpkin seeds, but the texture and flavor will slightly differ.
Are these energy balls suitable for a vegan diet?
Absolutely! Using maple syrup or coconut nectar keeps this recipe completely vegan-friendly.
PrintLemon Energy Balls Recipe
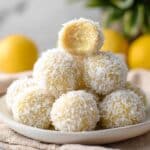
These refreshing Lemon Energy Balls are a perfect no-bake snack packed with healthy fats, fiber, and a bright citrus flavor. Combining cashews, shredded coconut, and zesty lemon juice and zest, these energy balls are lightly sweetened with coconut nectar or maple syrup and enhanced with nutrient-dense hemp seeds. They make an easy, on-the-go treat that is gluten-free, vegan, and free of refined sugars.
- Prep Time: 10 minutes
- Cook Time: 0 minutes
- Total Time: 10 minutes
- Yield: Approximately 20 energy balls 1x
- Category: Snack
- Method: Blending
- Cuisine: American
- Diet: Gluten Free, Vegan
Ingredients
Main Ingredients
- 1 cup Cashew
- 1 1/2 cup Shredded Coconut (Unsweetened)
- 3 tablespoons Coconut Nectar (or maple syrup or sugar-free syrup)
- 1/4 cup Lemon Juice (about half a lemon)
- 2 tablespoons Lemon Zest
- 2 tablespoons Hemp Seeds (or chia seeds or sunflower seeds)
- 1/3 cup Unsweetened Desiccated Coconut (for coating)
Instructions
- Prepare the base mixture: In a food processor fitted with the S blade attachment, combine the cashews and unsweetened shredded coconut. Pulse on high speed until the ingredients form a fine meal-like texture.
- Add wet ingredients: Pour in the coconut nectar (or maple syrup), fresh lemon juice, and lemon zest. Blend again on high speed until the mixture forms a sticky dough that starts to come together.
- Incorporate seeds: Add hemp seeds (or your choice of chia or sunflower seeds) and pulse a few times to evenly incorporate them throughout the dough.
- Adjust dough consistency: If the dough feels too wet, add additional shredded coconut two tablespoons at a time, pulsing to blend after each addition. If the dough is too dry, add a tablespoon of cold water and blend, repeating until the desired sticky dough consistency is reached.
- Form energy balls: Scoop approximately one tablespoon of dough and roll it between your palms to form a ball, then roll each ball in the unsweetened desiccated coconut to coat thoroughly.
- Set aside and continue: Place the coated energy balls on a plate lined with parchment paper while rolling the remaining dough into balls and coating them.
- Refrigerate: Store the finished energy balls in an airtight container in the refrigerator for up to one week to maintain freshness.
- Freeze for longer storage: For extended shelf life, freeze the energy balls in an airtight container for up to three months. Thaw at room temperature before serving.
Notes
- Replace coconut nectar with maple syrup or sugar-free syrup for different sweetness options.
- You can switch hemp seeds with chia seeds or sunflower seeds depending on availability or preference.
- Adjust the dough moisture by adding shredded coconut or water incrementally to get the perfect sticky texture for rolling.
- Store energy balls in the fridge for convenient grab-and-go snacks or freeze for long-term storage.
- This recipe is naturally gluten-free, vegan, and free from refined sugars.
Keywords: lemon energy balls, no-bake snack, vegan energy balls, gluten-free snack, healthy snack, cashew energy bites, coconut lemon balls, hemp seeds, citrus snack