Homemade Cheez-Its Recipe
Introduction
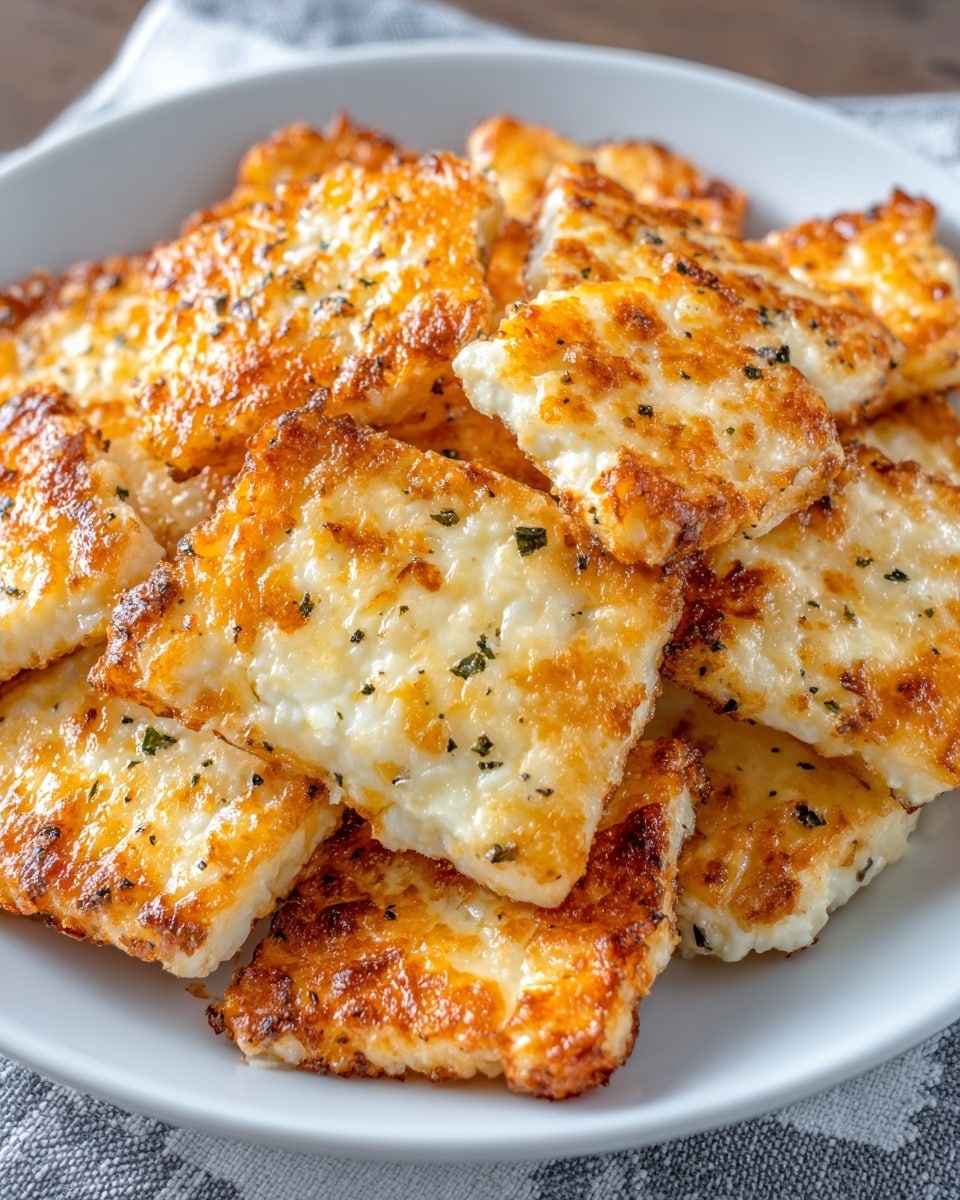
Homemade Cheez-Its are a delightful and cheesy snack that’s easy to make in your own kitchen. With just a few simple ingredients, you can enjoy a crispy, flavorful treat any time.
Ingredients
- 1 cup shredded Cheddar cheese
- 1 cup all-purpose flour
- 6 tablespoons cold butter, cut into small pieces
Instructions
- Step 1: Combine the shredded Cheddar cheese, flour, and cold butter in a mixing bowl. Use your fingers or a pastry cutter to blend until the mixture forms a dough.
- Step 2: Roll the dough out on a lightly floured surface to about 1/8-inch thickness. Cut into small squares or desired shapes.
- Step 3: Place the cut pieces on a baking sheet lined with parchment paper. Prick each square with a fork to prevent puffing.
- Step 4: Bake in a preheated oven at 350°F (175°C) for 12-15 minutes, or until the crackers are golden and crisp. Let cool before serving.
Tips & Variations
- For a sharper flavor, try using aged Cheddar or mix in some Parmesan cheese.
- Adding a pinch of cayenne pepper or smoked paprika can give your Cheez-Its a spicy twist.
- Use a pizza cutter for evenly sized squares and faster preparation.
Storage
Store homemade Cheez-Its in an airtight container at room temperature for up to one week. Keep them dry to maintain crispness. If they lose their crunch, briefly reheat in a 300°F (150°C) oven for a few minutes.
How to Serve
Serve this delicious recipe with your favorite sides.
FAQs
Can I use different types of cheese?
Yes, you can substitute Cheddar with other cheeses like Gouda or Monterey Jack, but keep in mind the flavor and melting properties may vary slightly.
How thin should I roll the dough?
Rolling the dough to about 1/8-inch thickness ensures the Cheez-Its bake evenly and become crispy without burning.
PrintHomemade Cheez-Its Recipe

Homemade Cheez-Its are a deliciously crispy, cheesy snack made from simple ingredients including sharp cheddar cheese, flour, and butter. These baked crackers offer a perfect balance of savory cheese flavor and satisfying crunch, making them an ideal treat for snacking or serving at gatherings.
- Prep Time: 15 minutes
- Cook Time: 15 minutes
- Total Time: 30 minutes
- Yield: About 60 crackers 1x
- Category: Snack
- Method: Baking
- Cuisine: American
Ingredients
Dry Ingredients
- 1 cup all-purpose flour
Cheese
- 1 cup sharp cheddar cheese, finely shredded
Fat
- 4 tablespoons unsalted butter, cold and cubed
Instructions
- Prepare the Dough: In a mixing bowl, combine the all-purpose flour and shredded sharp cheddar cheese. Add the cold, cubed unsalted butter. Using a pastry cutter or your fingers, blend the ingredients together until the mixture forms coarse crumbs.
- Roll Out the Dough: Transfer the dough onto a lightly floured surface and roll it out evenly to about 1/8 inch thick, ensuring uniform thickness for even baking.
- Cut and Shape Crackers: Using a sharp knife or pizza cutter, slice the dough into small square shapes, approximately 1 inch by 1 inch. For an authentic look, you can prick each square with a fork to prevent puffing.
- Bake: Preheat the oven to 375°F (190°C). Arrange the cut dough squares in a single layer on a baking sheet lined with parchment paper. Bake for 12 to 15 minutes, or until the crackers are golden brown and crisp.
- Cool and Serve: Remove the baked crackers from the oven and let them cool completely on a wire rack to achieve maximum crispness before serving.
Notes
- Use sharp cheddar cheese for the best flavor and color.
- Ensure butter is cold for a flaky texture.
- Keep dough thickness consistent to avoid uneven baking.
- Store crackers in an airtight container to maintain freshness.
- You can add a pinch of cayenne pepper or smoked paprika for a spicy twist.
Keywords: homemade cheez-its, cheese crackers, baked snack, cheddar crackers, crispy cheese snacks