Chocolate Oreo Pumpkin Whip Pie Recipe
Introduction
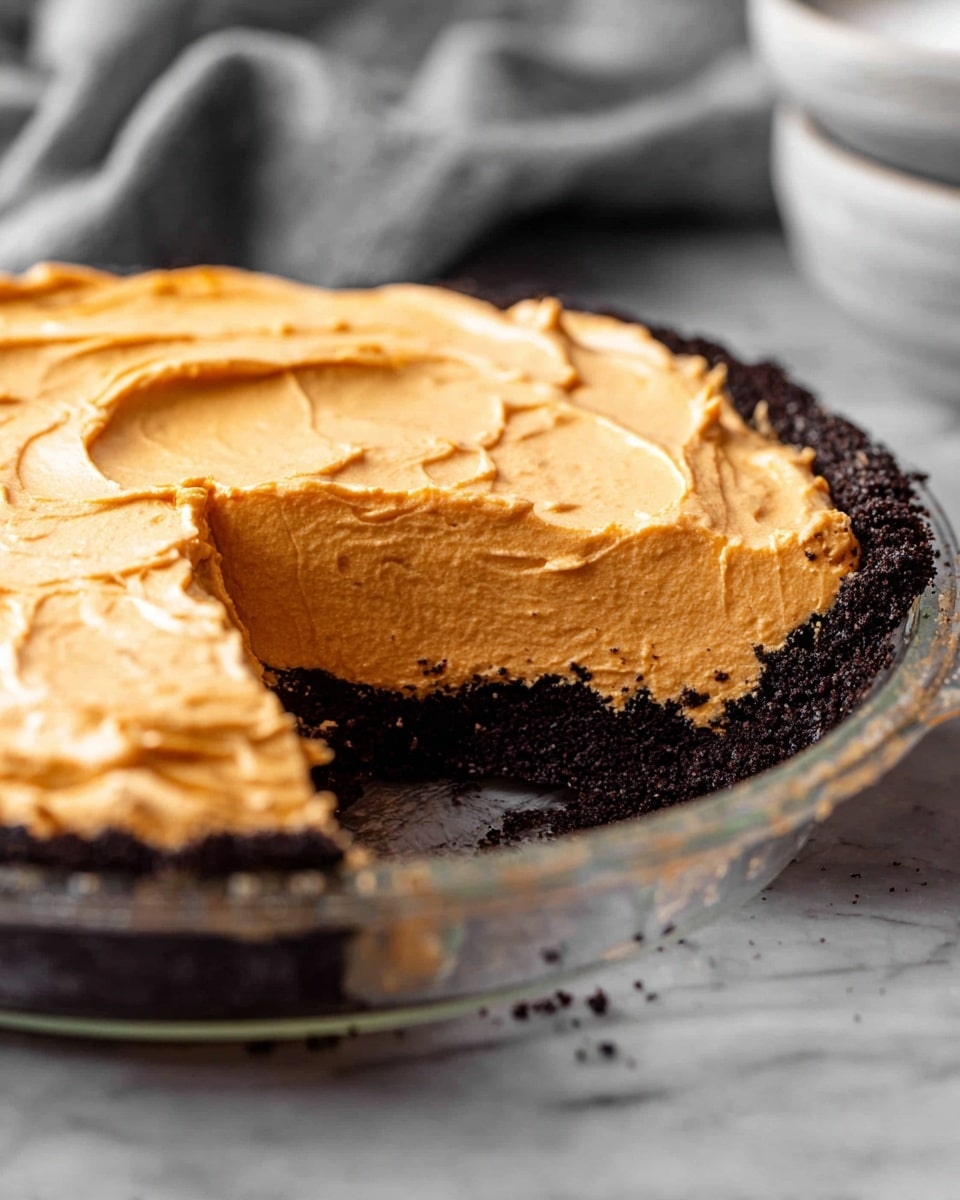
This Chocolate Oreo Pumpkin Whip Pie is a delightful blend of creamy pumpkin filling and a crunchy Oreo crust. Perfect for autumn gatherings or whenever you crave a festive treat, it’s easy to make and sure to impress.

Ingredients
- 26 Oreos (one standard package)
- 4 tablespoons unsalted butter, melted
- 8 ounces cream cheese, softened
- 1 1/4 cups powdered sugar
- 1 cup canned pumpkin puree
- 2 teaspoons pumpkin pie spice
- 8 ounces Cool Whip (about 2 cups)
Instructions
- Step 1: Preheat your oven to 350°F (175°C).
- Step 2: Place the Oreos in a food processor and pulse until they turn into fine crumbs.
- Step 3: Add the melted butter to the Oreo crumbs and process again until combined evenly.
- Step 4: Press the Oreo mixture firmly into the bottom of a pie plate, creating an even crust layer.
- Step 5: Bake the crust for 7 minutes, then turn off the oven and allow it to cool completely inside.
- Step 6: In a stand mixer, combine cream cheese and powdered sugar. Start mixing on low speed, then increase to medium until smooth and well combined.
- Step 7: Add pumpkin puree and pumpkin pie spice to the cream cheese mixture, mixing until smooth.
- Step 8: Gently fold in the Cool Whip until fully incorporated.
- Step 9: Pour the pumpkin filling into the cooled Oreo crust and spread evenly.
- Step 10: Refrigerate the pie for at least 2 hours before serving to set.
Tips & Variations
- For extra crunch, sprinkle crushed Oreos on top before serving.
- Use homemade whipped cream instead of Cool Whip for a fresher taste.
- You can substitute pumpkin pie spice with equal parts cinnamon, nutmeg, and cloves if needed.
- Chill the cream cheese beforehand to make mixing smoother and prevent lumps.
Storage
Store the pie covered in the refrigerator for up to 3 days. Reheat is not recommended since it’s a chilled dessert. If you want to keep it longer, freeze it for up to 2 weeks and thaw overnight in the fridge before serving.
How to Serve
Serve this delicious recipe with your favorite sides.
FAQs
Can I use a different type of cookie for the crust?
Yes, any chocolate wafer or sandwich cookie will work well. Just make sure to crush them finely and adjust butter as needed to bind the crust.
Is it necessary to bake the crust?
Baking the crust helps it set firmly and enhances its flavor, but you may skip this step if pressed for time. The texture might be softer but still delicious.
PrintChocolate Oreo Pumpkin Whip Pie Recipe

This Chocolate Oreo Pumpkin Whip Pie combines a crunchy Oreo crust with a creamy, spiced pumpkin filling and fluffy whipped topping. Perfect for fall festivities or anytime you want a no-bake pie that’s both indulgent and easy to prepare.
- Prep Time: 15 minutes
- Cook Time: 7 minutes
- Total Time: 2 hours 22 minutes
- Yield: 8 servings 1x
- Category: Dessert
- Method: Baking
- Cuisine: American
Ingredients
Crust
- 26 Oreos (one standard package)
- 4 tablespoons unsalted butter, melted
Filling
- 8 ounces cream cheese, softened
- 1 1/4 cups powdered sugar
- 1 cup canned pumpkin puree
- 2 teaspoons pumpkin pie spice
- 8 ounces Cool Whip (about 2 cups)
Instructions
- Preheat Oven: Begin by preheating your oven to 350°F (175°C) to prepare for baking the crust.
- Prepare Oreo Crust: Place the Oreos in a food processor and pulse until they become fine crumbs.
- Combine Crust Ingredients: Add the melted butter to the Oreo crumbs in the food processor and blend until the mixture is well combined and evenly moist.
- Form and Bake Crust: Press the Oreo and butter mixture firmly into the bottom of a pie plate to form the crust.
- Bake Crust: Bake the crust in the preheated oven for 7 minutes, then turn off the oven and let the crust cool completely inside the oven to prevent cracking.
- Beat Cream Cheese and Sugar: In a stand mixer, add the softened cream cheese and powdered sugar. Mix on low speed at first, then increase to medium speed until the mixture is smooth and well combined.
- Add Pumpkin Mix: Pour in the pumpkin puree and pumpkin pie spice, continuing to blend until the filling is completely smooth and evenly mixed.
- Incorporate Cool Whip: Gently fold in the Cool Whip until the filling is light, airy, and fully combined.
- Assemble Pie: Pour the pumpkin filling over the cooled Oreo crust, smoothing it out evenly with a spatula.
- Chill: Refrigerate the assembled pie for at least 2 hours to set before serving. Enjoy chilled.
Notes
- For a stronger pumpkin spice flavor, adjust the pumpkin pie spice to taste.
- Ensure cream cheese is softened to avoid lumps in the filling.
- This pie is best served within 2 days for freshness.
- Use full-fat cream cheese and Cool Whip for the creamiest texture.
- Do not overbake the crust to keep it crumbly but firm enough to hold the filling.
Keywords: pumpkin pie, Oreo crust, no bake pie, whipped topping, fall dessert