
Creamy Baked Mac and Cheese with Panko Breadcrumb Topping Recipe
Introduction
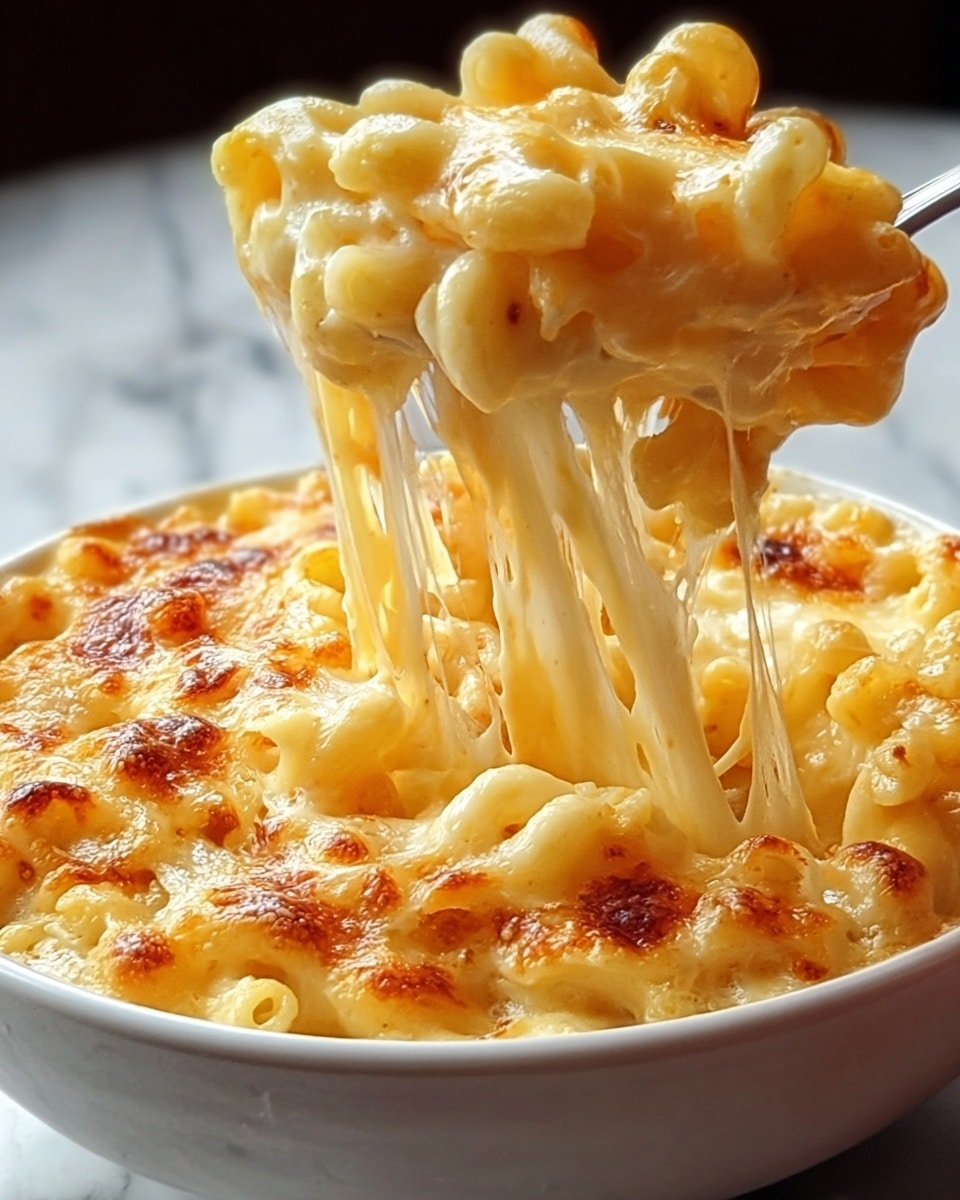
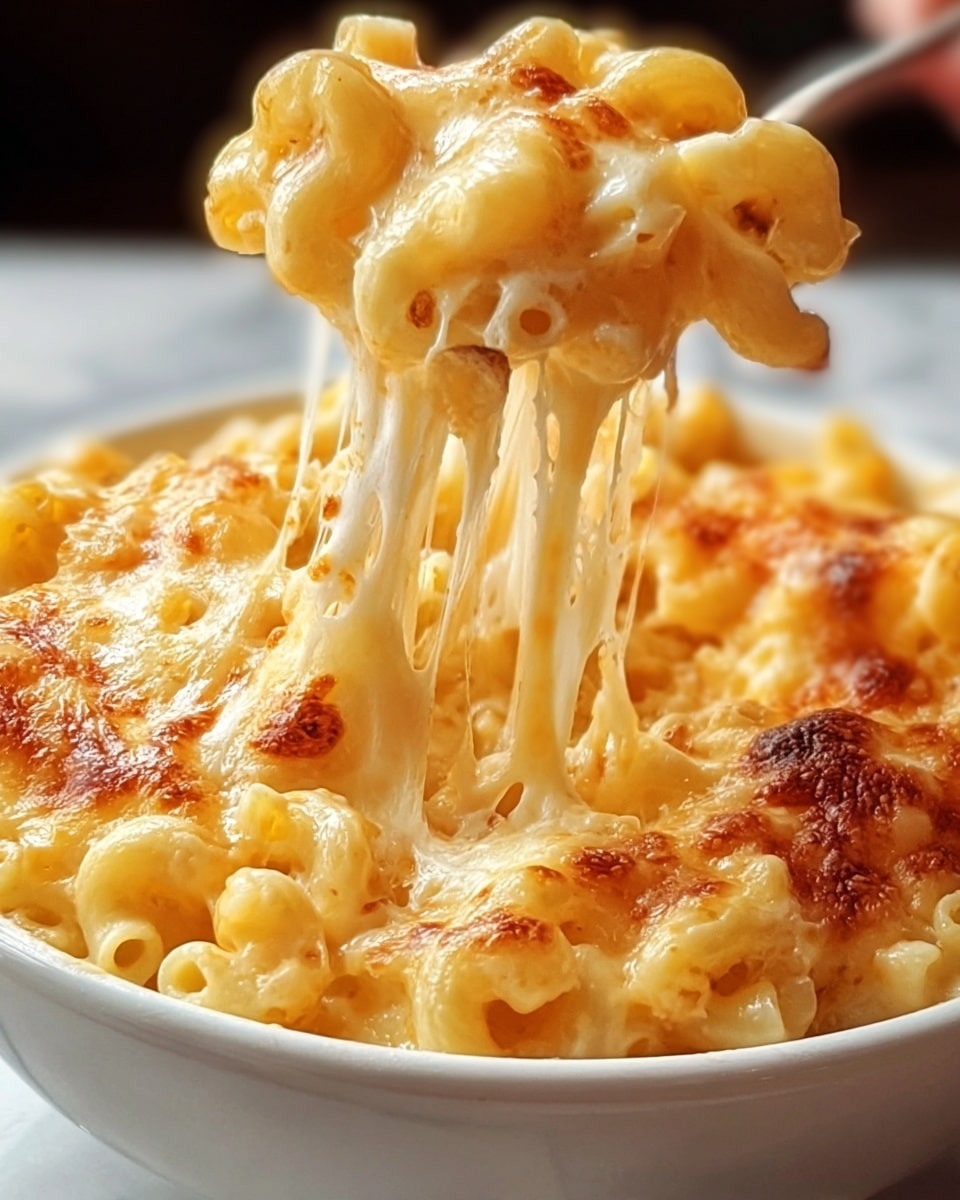
Mac and cheese is a timeless comfort food loved by all ages. This recipe creates a creamy, cheesy sauce perfectly coating tender elbow macaroni, finished with a crunchy golden breadcrumb topping. It’s an easy dish to make that always satisfies cravings for something warm and delicious.
Ingredients
- 8 oz elbow macaroni
- 2 cups sharp cheddar cheese, shredded
- 2 cups whole milk
- 4 tbsp unsalted butter
- 2 tbsp all-purpose flour
- 1 cup panko bread crumbs
Instructions
- Step 1: Bring a large pot of salted water to a boil. Add the elbow macaroni and cook until al dente, about 7-8 minutes. Drain the pasta and set it aside.
- Step 2: In a saucepan over medium heat, melt the butter until it becomes bubbly. Whisk in the flour until the mixture is smooth and cook for about 1 minute to form a roux.
- Step 3: Gradually pour in the milk while whisking constantly to avoid lumps. Continue cooking and stirring until the sauce thickens slightly.
- Step 4: Remove the saucepan from heat and stir in the shredded cheddar cheese until fully melted and smooth.
- Step 5: Add the cooked macaroni to the cheese sauce and mix until the pasta is well coated.
- Step 6: Transfer the mixture to a greased baking dish. Sprinkle the panko bread crumbs evenly over the top.
- Step 7: Bake in a preheated oven at 350°F (175°C) for 20-25 minutes, or until the top is golden brown and crispy. Serve warm.
Tips & Variations
- For extra flavor, add a pinch of paprika or mustard powder to the cheese sauce while cooking.
- Substitute sharp cheddar with a mix of cheeses like Gruyère and mozzarella for a richer taste.
- Use whole wheat or gluten-free pasta if preferred, and ensure your breadcrumbs match any dietary needs.
- Mix some cooked bacon or sautéed onions into the cheese sauce for added texture and flavor.
Storage
Store leftover mac and cheese in an airtight container in the refrigerator for up to 3 days. To reheat, warm in the oven at 350°F (175°C) until heated through or microwave in short intervals, stirring occasionally to maintain creaminess.
How to Serve
Serve this delicious recipe with your favorite sides.
FAQs
Can I use a different type of pasta?
Yes, any short pasta shapes like shells, rotini, or penne work well as they hold the cheese sauce nicely.
How can I make this recipe vegetarian?
This recipe is already vegetarian, but to keep it strictly vegetarian, ensure the cheese used is free from animal-derived rennet.
PrintCreamy Baked Mac and Cheese with Panko Breadcrumb Topping Recipe

This classic Mac and Cheese recipe features creamy sharp cheddar cheese sauce blended with perfectly cooked elbow macaroni, topped with crunchy panko breadcrumbs, and baked to golden perfection. It’s a comforting and delicious dish perfect as a main course or side dish.
- Prep Time: 10 minutes
- Cook Time: 35 minutes
- Total Time: 45 minutes
- Yield: 4 servings 1x
- Category: Main Course
- Method: Baking
- Cuisine: American
Ingredients
Pasta
- 8 oz elbow macaroni
Cheese Sauce
- 2 cups sharp cheddar cheese, shredded
- 2 cups whole milk
- 4 tbsp unsalted butter
- 2 tbsp all-purpose flour
Topping
- 1 cup panko bread crumbs
Instructions
- Cook the Pasta: Bring a large pot of salted water to a boil. Add the elbow macaroni and cook until al dente, approximately 7-8 minutes. Drain the pasta thoroughly and set it aside.
- Make the Roux: In a medium saucepan over medium heat, melt the unsalted butter until bubbly. Whisk in the all-purpose flour continuously until the mixture is smooth and cook it for about 1 minute to remove the raw flour taste.
- Add Milk: Gradually pour in the whole milk while whisking constantly. Continue whisking until the mixture thickens slightly and becomes smooth, forming a creamy base for the cheese sauce.
- Add Cheese: Remove the saucepan from heat and immediately stir in the shredded sharp cheddar cheese until fully melted and the sauce is creamy.
- Combine Pasta and Sauce: Add the cooked elbow macaroni into the cheese sauce and mix well until every piece of pasta is thoroughly coated with the cheesy sauce.
- Bake: Transfer the mac and cheese mixture to a greased baking dish. Evenly sprinkle the panko breadcrumbs on top. Bake in a preheated oven at 350°F (175°C) for 20-25 minutes or until the top is golden brown and crispy. Remove from oven and let it rest briefly before serving.
Notes
- For a sharper flavor, use extra sharp cheddar cheese or a blend of cheeses.
- To make it gluten-free, substitute the all-purpose flour and panko breadcrumbs with gluten-free alternatives.
- Use whole milk for creaminess, but you can substitute with 2% milk for a lighter option.
- Ensure the cheese is shredded for quicker melting and smoother sauce.
- Let the baked mac and cheese cool for a few minutes to set before serving.
Keywords: Mac and Cheese, Cheesy Pasta, Baked Macaroni and Cheese, Comfort Food, Classic Mac and Cheese